Hello, old and new readers! As you can see from my title, I decided to take a break from the beauty reviews and do a D.I.Y tutorial instead. Summer music festivals all over the world are coming up in less than two weeks and of course, with such a massive event, you gotta have the daisies!

Flower headbands have picked up in the trends for music fesivals, such as this year's Coachella Music Festival. I saw so many flower headbands on Instagram this year. While many of them looked beautiful, I couldn't believe how expensive they were--$130 and up! Those better had contain some rare, exotic, real flowers flown in from the jungles of Brazil! or something Anyways, all kidding aside, in this tutorial, I'm going to show you how to make a flower headband for less than $25. In fact, this tutorial is actually good for 3-4 headbands.

Flower headbands have picked up in the trends for music fesivals, such as this year's Coachella Music Festival. I saw so many flower headbands on Instagram this year. While many of them looked beautiful, I couldn't believe how expensive they were--$130 and up! Those better had contain some rare, exotic, real flowers flown in from the jungles of Brazil! or something Anyways, all kidding aside, in this tutorial, I'm going to show you how to make a flower headband for less than $25. In fact, this tutorial is actually good for 3-4 headbands.

Before I get into the tutorial, let me just say this--WOW. I'm overwhelmed by how quickly my giveaway has grown. I really didn't expect my giveaway to receive that many entries, but thank you so much to those who have participated! And also, thank you for all of the wonderful suggestions in my comments. :') I truly appreciate how everyone has helped this blog grow and I will continue to try my best to put out fun, quality entries. The giveaway is still going on until the end of this month, so for those of you who haven't joined it yet and are interested, please feel free to join here.

So let's get started! Since it was such a beautiful day, I decided to take my workstation outside. For this tutorial, you will need:
- Fake flowers - $6.50
- Hot glue gun (high heat) + glue sticks - $6.99 + $2.99
- Elastic headbands - $4.89
- Thumbtacks - $1.73
- Scissors - $1.00
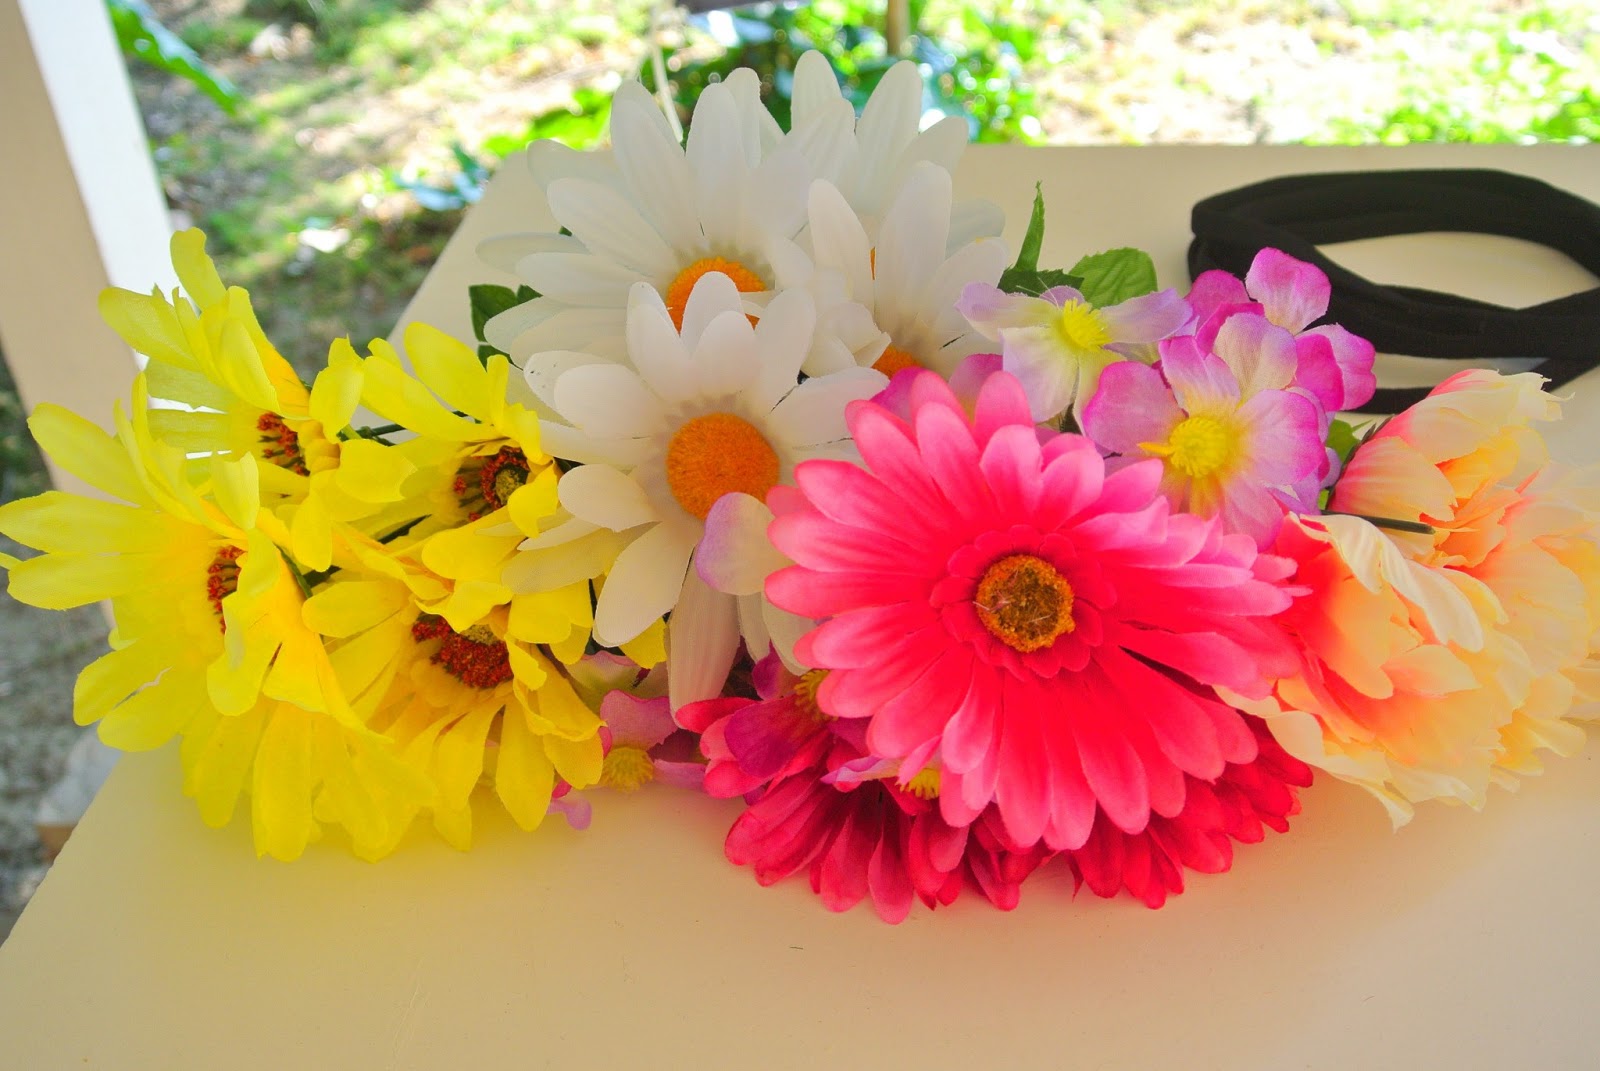
The total comes out to $24.10, which is definitely under $25. I got the fake flowers from The Dollar Tree, which sells a wide variety of fake flower bundles. A truly great value, I must say, considering you get around six flowers for $1. I got six bundles of flowers, thirty-six flowers in total,just in case I wanted to use them on other articles of clothing or make extra headbands. If you live in the US, there are plenty of stores throughout the nation.

1. First, remove the fake flower from its stem. You should be able to pull it off easily, but if it's glued to the stem, simply cut the flower off from the stem. If you wish to add leaves, remove the leaves from the stem as well. They should slide off easily after you have removed the flower.
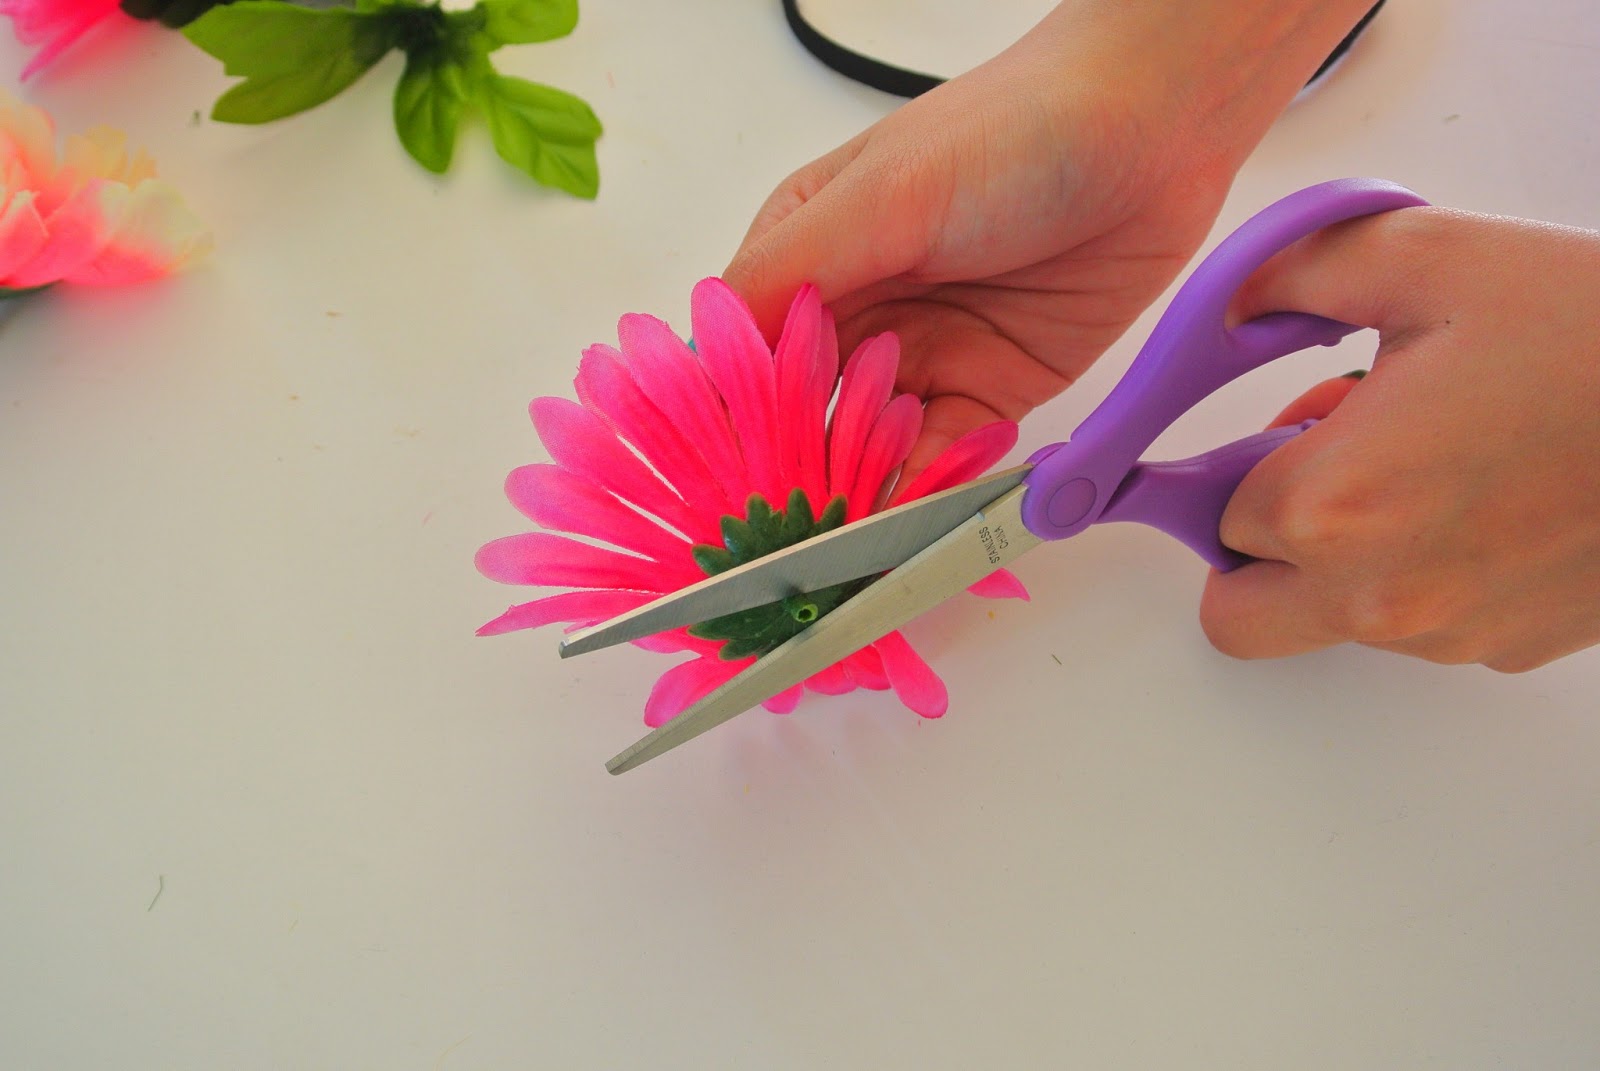
2. If the base that is stuck to the flower is too long, then feel free to cut it with a pair of scissors. The shorter the stick, the better it will be for when you need to glue this to your headband. You'll want your flower to be able to attach to the headband as closely as possible.

3. So that you have an idea of how your flower headband is going to look, roughly map out where you want your flowers and leaves to be.

4. After you figure out where you're going to place your flowers, take a thumbtack and pierce the elastic headband. It should pierce with relative ease. I know I'm being Captain Obvious here, but please buy flat thumbtacks, you really don't want anything to be poking your scalp when you're wearing your headband =p

5. As soon as your glue gun is heated up, squeeze a small amount of hot glue by pressing on the glue gun's nozzle lightly. Don't distribute too much product or else you might burn yourself when you press the flower onto the headband. Just dispense enough so that the pointed end of the thumbtack is coated all around with hot glue.

6. Fit the small hole over the pointed end of the thumbtack and press the flower down until it lies flat against the headband.

7. Hold it there for around 15 seconds or until you know the flower is secure. Hot glue dries pretty quickly, so it shouldn't be long until you can move on to the next flower. Be careful not to burn yourself. Of course, me being the klutz I am, before I began this tutorial, I accidentally picked up the glue gun on the wrong side.......don't ask me how that happened.

8. Repeat this step with your flowers, leaving some space in between your flowers for when you place your leaves. Try to keep your flowers evenly spaced, but it doesn't have to be exact.

9. After you have glued all of your flowers to the headband, now it's time to add the leaves. You can place the leaves wherever you wish, whether you want it to be evenly distributed or random. I alternated mine in between the flowers. Repeat the steps that you did with the flowers, using a hot glue and thumbtack to secure the leaves.

10. You can use any type of leaves that you want, but I wanted mine to look neat for this headband, so I made sure they were arranged as symmetrically as possible.

Ta-da! Now you're finished and you have a lovely flower crown that you can wear to any music festival, concert, fair, photo shoot or just about anywhere you'd like. You can mix and match different flowers, add more or less; that's pretty much the fun of making this flower headband.

For my face, I kept my makeup simple with just a dark brownish bronze smokey eye and to match my pink flowers, I added a bright pink lip as well. Since you're probably going to be wearing this outdoors, you don't want your makeup to melt and look messy, so I'd advise you to just keep it simple and feminine.

What I love most about this headband is how versatile it is. You can wear it many ways such as with silky, straight hair or with loose waves, like I did here. You can even wear it with a nice side braid or a trendy fishtail braid. You can wear the headband around your forehead a'la hippie/flower-child style. You can even just glue one flower onto the headband and place it so that you have a flower on the side of your head.

Since I had a lot of extra material, I decided to make another flower headband. For this one, I used yellow daisies, combined with small purple flowers. I didn't make it quite as uniform as my pink flower headband, but I thought it still looked lovely.

Flower crowns often evoke a sense of etherealness and whimsicality, which is why they look so perfect for the spring and summer season. I tried to keep this tutorial as informative and simple as possible and I hope you enjoyed reading this. Please let me know what you think of this tutorial in the comments below! Have you made any flower headbands or are you looking to make or purchase one? Where would you wear your flower headband to?
Well, until next time guys, happy flower crowning!
With love, Tiffany
Awww I saw this on your instagram earlier :) I LOVE the pink one! And beyond that, I love your nail polish and lip color! The flowers suit your face/makeup so well. :) Thanks for the cool tutorial, maybe I'll try making one too keke.
ReplyDeletelol thank you, Tiffany! haha yes you definitely should try! it was actually really fun to make, I had a great time that afternoon just putting headbands together :D totally random question, but how warm does it get in Alaska this time of the year?
DeleteYou're amazing tiff! Haha I love this DIY tutorial much! Though I know I won't be able to make it xD I'm too lazy and usually I just buy flower crowns from the store haha xD but I really love the yellow flower crown reminds me of sunflowers and I love them x3 you look like spring goddess in your pictures <3
ReplyDeleteAwww, Misa, I always smile reading your comments! xD hehe yeah, it would probably be easier to buy them from the store. I'm actually going to a music festival next week so I thought it'd be a fun project to do and share here. But thank you for your lovely compliment lol random-flower-concert-attendee was what I was going for, but I like spring goddess better <3
Deletetotally not random-flower-concert-attendee cause you look more fabulous <3 haha you should change to disqus so I'd know if you replied my comments XD anyway I nominate you for the VBA here http://www.misaraisu.com/2013/06/versatile-blogger-award.html ^^
DeleteD'awww hahaha thank you, Misa! xD you know what, you're like the 2nd person this week who's told me to change to Disqus so I'm gonna do that right now lololol and thank you for nominating me, wow it seems like this award is so popular, it's going around like hot cakes! I will definitely fill it out soon :D
DeleteSo cute, Tiffany! I love it! Also who takes your photos when you do tutorials like this? :)
ReplyDeleteThank you, Kristine! lol my boyfriend actually helped me with this haha this is the first time he did this :D
Deletecuuuuuuuuuuuuuuuute! :D we have same methods on posting a tutorial :D thanks for following my blog pretty Tiffa :D
ReplyDeletefrom Myxilog with love <3
Ahaha no problem, I love the DIYs and recipes on your blog :) And yes, we actually do! haha always good to have a lot of pictures with the instructions :D
DeleteIt looks so lovely on you! I love DIY! Thanks for the tutorial, looking forward to more DIY! ^^
ReplyDeleteAwww lol thank you, Lie-ying! haha no problem, I know I haven't done DIYs often, it was fun to take a break and write reviews. I'll definitely post more DIYs if I have other cute ideas :D
DeleteThat looks so nice. I love flower headbands and making them by yourself is even better!:D
ReplyDeleteThank you haha me too, if I had known it was so easy and fun , I would've made them sooner! :)
DeleteIt looks so pretty on you Tiffany! ^0^ I'll definitely try making one of these myself over summer, though I kind of suck at DIY stuff, you made it look so easy! xx
ReplyDeleteAww haha thank you! I'm actually not that DIY-savvy myself but this is really easy lol I'm sure you'll be able to make a pretty one :D
Deletegreat tutorial! it looks good on you. have fun in vegas!! i wish i could go, but i can't get erick to commit to going to another rave ever again :C ohhhh weelllssss
ReplyDelete- sarah -
www.xliciousgirl.com
lol thank you, Sarah! haha I'm super excited to go xD I can understand where Erick is coming from haha those things are fun but super hectic >< Hun only wants to go one day and rest for the other two days :3
DeleteLarge floral headwear is definitely perfect for Summer and the fact that you have created them yourself is fantastic, the colours are so bold!
ReplyDeleteWe are now following you.
Love
M&B
x
lol thank you haha it seemed so easy to make so I decided I'd rather make my own than pay a lot of money to buy one :) And thank you for following! <3
DeleteAww, you look gorgeous! I really need to get myself a hot glue gun. They're so versatile for any DIYs but I can never seem to get myself to buy one. Probably because I'm lazy to make things, haha. Great tutorial though! I shall come back to this in the springtime if I do end up trying to make one. ^-^
ReplyDeletelol thank you! :) haha yeah, they're super easy to use, I know I always used to make such a mess out of them when I was younger but they come in really handy for doing random crafts and DIYs. You should though haha I'd love to see it if you ever do :D
DeleteThis is so cute! Lovely post! :)
ReplyDeleteKelly xx
http://thebellelavieproject.blogspot.co.uk/
Thank you, Kelly! :D
Deletethanks for the tutorial! i will definitely try and make one instead of buying it because they are so expensive! what color is your nail polish btw? it's super cute.
ReplyDeleteNo problem haha I know! I saw some really pretty flower crowns going for over $100 whenever music festivals rolled along, but I mean, they're just flowers, wires and glue haha not worth THAT much. And my nail polish is Essie's "Where's my chauffer" :)
DeleteThis is soo pretty! I've always wanted to make a flower crown but I don't have any events to wear it to, haha.
ReplyDeleteAnyway, I tagged you in the Colors of the Rainbow Tag! :3
Thank you, Natalie! haha yeah I only made this for a music festival but I don't know when I'd use it again :3 Ooh and thank you for tagging me haha it looks fun! :D
DeleteI nominated you for VBA + Liebester award! ♥ ^___^
ReplyDeletekrystallvl.blogspot.co.uk
Aww haha thank you so much, Krystal! hahhaha you're like the 5th person who's nominated me for the Liebster. I will check out your blog and add to my entry <3
DeleteWhat a nice idea. Your flower headbands are very pretty^^
ReplyDeleteCheers,
Dreamy Princess
hehe thank you, just wanted to do something fitting to the spring and summer weather :D
DeleteAww this looks so cute!
ReplyDeleteI've also nominated you for the versatile blogger award! I hope you'll do it ^_^ http://samthebear.com/blog/2013/06/22/the-versatile-blogger-award-vba/
Awww thank you so much! haha I actually have a quite few Versatile Blogger awards that I still need to do, but I'll let you know when I've posted it <3
DeleteLooking fab dear...I must say this colorful hairband with wonderful Arrangement of Flowers looks good on you..
ReplyDeleteThank you! :D
Deletedefinitely going to try this out, you look so pretty!xxx
ReplyDeletehttp://www.berry-crumble-xxx.blogspot.co.uk/
Yayyy! haha I get happy when people tell me that they'll try doing this! If you do, I'd love to see it :D
DeleteTiff ur so talented! Love your DIY project. I want to do this as well ^_^ Awesome tutorial !
ReplyDeleteAww hehe thank you, lovely! Flower crowns have gotten so popular, it was too tempting to not do! Let me know if you ever do make one, I wanna see <3
Deletewow *-* It looks so cute on ! <3 It's actually a really good idea to do it by yourself! I saw a few ulzzangs wear flower headbands too and it's realy nice for summer and spring c:
ReplyDeletebtw, I nominated you for The Versatile Blogger Award :D It would be nice if you'd check it out and make a post with random facts about you too~I think it's nice to read something personal about the blogger too c:
Here's the link ^~^*
http://mymychen.blogspot.de/2013/06/the-versatile-blogger-award-vba.html
awww hehe thank you! I didn't know that it was popular in Korea as well, I must check out those pictures. And thank you so much for nominating me! haha I've been meaning to fill it out since a few other bloggers nominated me as well. I definitely will when I have some time, and I'll let you know when I do <3
DeleteI love this! Did you have trouble with it staying on?
ReplyDeleteHow did you like EDC? You should post your whole outfit! :) I went for the first time last year....don't think I'll do it again because it's not my thing, but it was still quite an experience.
Love your make-up! You're so prettyyyyy, geez! :)
Awww Ashley, you're so sweet! *blush* xD I didn't have too much trouble keeping it on me but it was a little hard to put on because the flowers got tangled in my hair often so I had to tie my hair up before putting it on. Ahahah yeah, I know it's definitely really crazy and hectic, I know a lot of people who liked it but didn't wanna go again because it was crazy. I had a really good time though, they really improved on a lot of things and were a lot more accomodating this year. The work that they put into the special effects were amazing hehe and I actually do have one picture of my whole outfit, but it's on my instagram :3
Deleteaw,,you're so talented! I have all items to make flower head band crown in my mother house,,hmm maybe i will try to make one :-D thank you for the tutorial <3
ReplyDeleteHehe thank you, Miss E! ahahah if you have all the materials already, you should definitely try making it! I've been getting my girl friends to make their own flower crowns as well, it's quite a fun DIY when you have some free time <3
DeleteWow,amazing post...I really like your blog.^^
ReplyDeleteMaybe follow each other on bloglovin?
Let me know follow you then back.
Lovely greets nessa
This is such an awesome tutorial! I loved your headbands when I saw your EDC photo on instagram. Ahh I'm so jealous you live in the US, I would love to attend EDC at least once :(
ReplyDeleteLouise
Vanity Corner // Giveaway
Ahahah thank you, Louise! I think EDC is like the only place I can think of where I can walk around in a flower headband for the rest of this year hehe and yeah, it was so awesome, I think they were really inspired by Tomorrowland over in Europe. Do they have any music festivals over there in Australia? Or any cool concerts? :D
Deleteaw cute flower headband :) thanks for sharing this!
ReplyDeletehehe no problem, Shayne! thank you for checking it out :D
DeleteThe headband looks gorgeous on you! Your tutorial has definitely made me want to make one, although it's already winter here in Sydney :p
ReplyDeleteCame across your site on bloglovin' and followed! x
missblissery.blogspot.com
Aww haha thank you, Camille! if you end up making one, I'd love to see it :) lol I heard from several other Aussie bloggers that it's winter over there! lucky you guys are experience some cool weather there because over here it's scorching hot! x.X thank you so much for following, followed back, looking forward to your updates <3
DeleteHey! I've nominated you for the Versatile blogger award :) Check it out @ http://be-bold-be-beautiful.blogspot.co.uk/2013/06/the-versatile-blogger-award-3rd.html
ReplyDeleteThank you so much, Tina! haha I'm definitely going to fill it out next week haha this award is so popular now! :D
Deletei nominate you in Liebster Award in my blog :)
ReplyDeletehttp://everydkawaii.blogspot.co.il/
Thank you so much for the nomination! I've already filled out some Liebsters in another entry but when I get the chance to update it, I'll let you know! :)
DeleteWhat a helpful tutorial! The crowns all look gorgeous on you. : )
ReplyDeleteThank you for creating this, it'll be a lot cheaper for me to make my own rather than to go out and buy them.
Also, I've nominated you for the Versatile Blogger Award! ^_^
http://suichuu.blogspot.com/2013/07/the-versatile-blogger-award.html
Awww thank you! haha I'm glad to read that you'll consider making your own! it's so easy and there are so many cute and creative ways to design your own, and it's tons of fun for a DIY project :D
DeleteAnd thank you so much for nominating me! haha I really need to start filling out this award! xD
I love this idea and it looks pretty easy too !! Never thought of making my own floral headband before I'm totally going to do it now Thanks :) xx
ReplyDeletelol no problem, I'm glad you found this tutorial helpful! haha I really wanted a floral headband when I started seeing them pop up at music festivals but found some of the prices unnecessarily high, it's much better to just make your own :D
DeleteBeautiful! Seriously! I have a few flower halos for girls (I use them for my photo session). This is another way to make those and I love it! Thank you for the tutorial!
ReplyDeleteAngela Butler - Clarksville, TN Photographer
thanks for sharing! i can't wait to try this
ReplyDeletexoxo
Winchell
http://myimperfectfantasy.blogspot.com
so prettyyy
ReplyDelete:)
significantlyred.blogspot.com
This is such a great idea!! I've been wanting to buy flower headbands but now I think I should make them myself :) hahahah :)
ReplyDeleteI'm new to blogging and would be delighted if you could check out my blog :)
http://beautyxtravel.blogspot.com
For everyone who has two left hands.. :) Flower tiara's made from vintage silk flowers found in Paris.
ReplyDeletehttp://www.roomofsoes.nl/c-1242842/headpieces/
love the crown! and you're so pretty x
ReplyDeleteemi-rii.blogspot.com
Awww thank you for reading, Emiri! And welcome to the blogosphere, you are pretty as well! <3
DeleteThis is a great tutorial! Thank you for posting it :) Also, love the pics <3
ReplyDeleteThank you for reading, glad you liked it! :D
DeleteYOU are so GORGEOUS!!! I love flower head bands, will def make one for this summer!
ReplyDeleteAwww thanks, Tifa but you're the one who is gorgeous! Ooh awesome, I'd love to see it when you make it <3
DeleteWhy do you use thumb tacks? Just wondered. Does that help keep the flowers on when you stretch the headband on your head?
ReplyDeleteI felt like adding hot glue to the thumb tacks and inserting the flower onto it would make the flower stick on better. You can just directly glue them on but the thumb tacks would more likely prevent them from falling off :)
Delete