Tuesday, March 18, 2014

BornPrettyStore False Eyelashes #1107 Review + Naked 3 Palette Smokey Eye Tutorial

Hello, beauties! It's been a while, hasn't it? I haven't been keeping up with my blog posts as much as I'd like to, but I have a few blog goodies that I look forward to sharing in the near future. For this blog post, I'd like to share a review of some lashes I've been sporting on my night outs and dates lately. BornPrettyStore was kind enough to send me a couple boxes of lashes for review purposes. For this post, I will be reviewing the False Eyelashes #1107 and saving the other box for a different entry.

I'm sure many of you have seen variations on these types of lashes at different retail stores. They appeal to many because of how affordable they are and at 10 pairs per box, that's quite the steal! Born Pretty Store sells a wide variety of these types of false lashes in so many different shapes and sizes. While I prefer to wear thick lashes when I'm going out, they also sell lighter and more natural selections. I had somewhat of a hard time trying to pick out which lashes to review, and some of them I already had myself from friends bringing them back to me from their Asia trips. However, the #1107 looked like the perfect combination of thickness and length.


The lashes arrived in a clear box in which I've removed the lid here. As I've stated before, they come in a box of 10 and each pair lasts quite a long time. In fact, I'm still on my first pair!


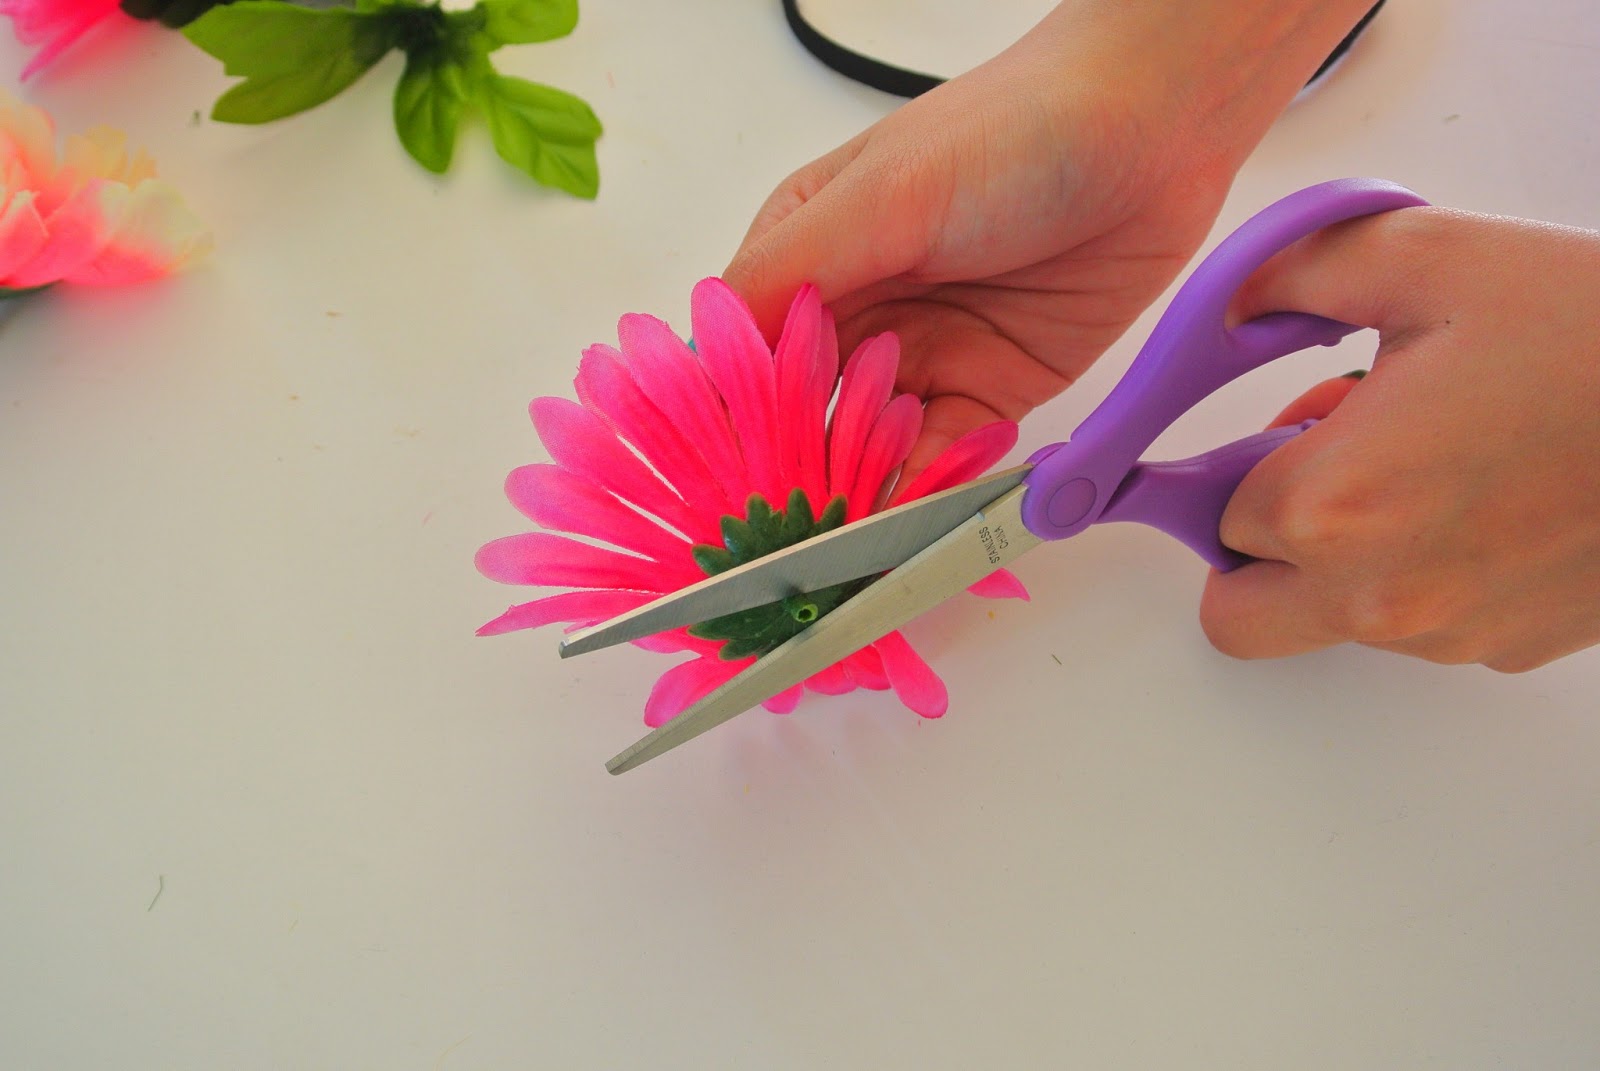
The shape of these lashes make a fine choice if you're looking for the rounded, doll-like eye look. Since the lash hairs are longest in the center, that emphasizes the center of the eye and gives it that little extra lift. And while they do look somewhat thick, I'd say these are more of the medium variety. These were a bit long for my eye and they were poking me a bit, so I had to cut them. However, this is no big deal, as  I have to do that with most lashes I end up buying anyways. So let's now break it down into the pros and cons. 

Pros
  • Great shape for making the eyes look rounder
  • Gives the eyes a little lift
  • Affordable at $2.99
  • 10 lashes per box--these will last you a long time before you ever run out
  • Comfortable to wear 
  • Durable and long-lasting 

Cons
  • Lash band is a bit thick so you may have to bend it a few times to adjust the shape 
  • May poke the inner or outer corners of the eyes if not cut properly 


Rating: ❤❤❤❤❤

Naked 3 Palette Smokey Eye Tutorial 


I must admit, I haven't done a tutorial in a while and was a little wary of putting it up...hence, why it's taken me so long to update. But I've managed to muster up the courage (and patience) to whip up this Naked 3 Palette smokey eye tutorial. I've been reaching for the Naked 3 palette a lot more lately after figuring out which colors work best with my skin tone. Sad to say I don't use all of the colors, but this is one of my favorite looks to wear when I feel like adding a little romance to my eye makeup. The overall color theme for this particular palette is pink so you definitely need to keep it sweet and feminine. But first, let's start with the review!


Here is a full list of products that I'll be using in this tutorial: 

  • Revlon Photoready Perfecting Primer
  • Makeup Forever Invisible Cover HD Foundation #120 
  • MAC Select Moisturecover  Concealer NW120
  • Anastasia Brow Wiz in "Ash Blonde"
  • Anastasia Tinted Brow Gel in "Caramel"
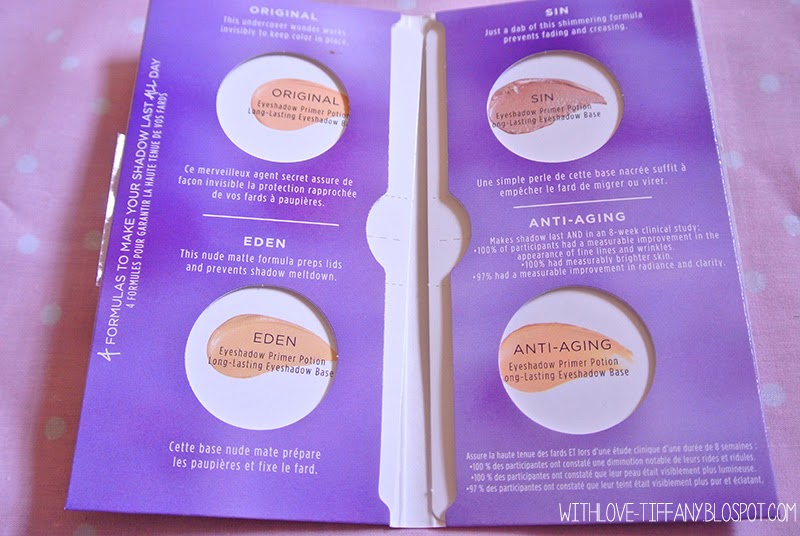
  • Urban Decay Potion Primer
  • Naked 3 Palette (In order of use: Nooner, Factory, Blackheart, Stranger, Dust) 
  • Dollywink Liquid Eyeliner (Black) 
  • Milani Liquif'ye (Brown)
  • Mabelline Falsies Mascara in "Very Black"
  • Benefit Hoola Bronzer 
  • Candy Doll Blush in "Strawberry Pink"
  • NYX Matte Lip Color in "Istanbul" 
  • Hourglass Ambient Lighting Powder in "Dim Light"
  • BornPrettyStore False Eyelashes #1107 
This is mainly going to be an eye makeup tutorial, as I'm sure most of you already know have your own foundation and face makeup routine. So before we get started on the eye makeup, please apply your primer, foundation and concealer.


1. Apply brow pencil to shape out your eye brows. As you can see, my lashes are quite light and sparse due to genetics and bleaching. Yes, I do bleach my brows every few weeks since I have blonde hair and it matches better to have light brows.

2. This step is optional, but you may go back and fill in your brows with a brow gel to brush the hairs into place. I also do this step to bring some warmth back in the otherwise ashy blonde brow pencil color.

3. With a medium eyeshadow brush, apply "Nooner" up to the orbital crease of your eye. This will deepen your sockets and serve as the main transition color.

4. Next, blend "Factory" a little past your eyelid but allow just a hint of "Nooner" to continue peeking out. Then blend the darkest color, "Blackheart", where your eyelid folds.


5. Use "Stranger" to highlight underneath your brow.

6. Apply liquid eyeliner to the top of your eyelid and line your waterline with dark brown eyeliner. You can also use black eyeliner but I find that dark brown goes on a lot softer and more natural. Take an angled eyeliner brush and apply a little bit of "Dust" to your inner corners.

7. Time to put on mascara! (Damn it, my friends were making me laugh here in this picture!)I love the Maybelline Falsies mascara because now they are a dual-ended product where you can apply mascara to both your top and bottom lashes. Of course, being a typical Asian and all, this doesn't make a huge difference so...

8. Add false eyelashes to complete the look. You'll want to go with something on the thicker side, as this is a smokey eye look and this works best with somewhat voluminous lashes. I will be giving more info on these lashes later on in this post.


And here is the complete look! I find this a very wearable look for those days I feel like dolling up a little more than usual. The eye makeup enhances the eyes without looking overdone and the pink colors in the Naked 3 palette work wonderfully for the upcoming spring and summer. 


And because this look is on the romantic side, I had to break out the pink blush and lips. Nude lips and subtle cheeks work fine for this look but I think that a pink flush is especially appropriate for a date night. What do you think of this color combination? 


Overall, I think every girl needs at least one box of these types of lashes I've used in this tutorial! They're inexpensive, reusable and are of great quality for their price. Although many other types of false lashes exist out there, these lashes are on par with many that I've used before. And I'm glad to say that these particular ones have definitely made it into my false lash rotation when I want my eyes to stand out in pictures. Check out BornPrettyStore's website for more choices in lashes, makeup, nail accessories and more. They have tons of makeup and fashion goodies for great prices, so shop till you drop! :)


For 10% off on your purchase, please visit their website and enter the promo code "TTH10" at check-out.

So what did you think of my Naked 3 palette makeup tutorial? The Naked 3 Palette is so versatile and I actually have a couple other regular looks I also do along with this particular one. I'm no makeup guru but I hope you enjoyed my tutorial. I'll try to do more makeup tutorials in the future. ^^ Also, let me know in the comments below what you thought of the false lashes I reviewed. Have you used any of these kinds of boxed lashes? Are you a fan of them? What are your favorite go-to false lashes you've been loving lately? <3

With Love, Tiffany 

Wednesday, February 5, 2014

Naked 3 Palette Review and Swatches

As 2013 came to a close, Urban Decay released the much anticipated Naked 3 Palette, which in turn, led makeup addicts as myself to act like one of those crazed Black Friday shoppers who decides to line up at 7PM on a Thanksgiving night. As soon as fellow beauty blogger, Lisa, alerted me at 6 in the morning of its release, I raced to the computer and purchased my own right before work started. By around 11AM, the Naked 3 Palette had sold out.


Now I know it's been a while since its release and many of you who've been waiting for its release have probably gotten it by now. But for those of you who are on the fence over whether or not its worth the splurge, then hopefully, my post will aid you in your decision. Although I'm a pretty big fan of Urban Decay eyeshadows and I pretty much only use them nowadays, I had my initial doubts on whether this palette would look good on me. As you can see, this palette is very pink-based and I wasn't sure if it would match my skin tone. I'm a light-medium tone in the winter time and I felt that this palette would perform best with light skin. However, after much experimentation with the variety of colors, I'm happy to say that this palette will suit a wide variety of skin tones and shades and worth gifting to yourself. So read on for more details!


First and foremost, I just have to get this out of the way: the box that the Naked 3 Palette comes in is gorgeous! Rose gold has been all the rage nowadays and everyone has been obsessed with the color. And the packaging on the actual palette itself is just as beautiful. It's fashioned similarly to the Naked 2 Palette and comes in a metal case with a wavy texture. The box also includes 4 different samples of the famed Urban Decay potion primer, which I will get more into detail later. 


Another neat thing about the Naked palettes is how they always manage to include a makeup brush. This brush is dual-ended and includes one side of patting the eyeshadow and one side for blending. The quality of this brush is wonderful and definitely gives this palette its bang for its buck. I only really use the blending brush end and it's pretty much replaced all of my other blending brushes. The blending side is more dense than other brushes I've seen, making it easier and faster to blend all of your colors together.


And here are the samples of the primer potions. I've never actually gotten the chance to try these yet but I am looking forward to trying out Sin the most. Here are the descriptions: 

Original - This undercover wonder works invisibly to keep color in place. 

Eden - This nude matte formula preps lips, and prevents shadow meltdown. 

Sin - Just a dab of this shimmering formula prevents fading and creasing.

Anti-Aging - Makes shadow last and in an 8-week clinical study: 
  • 100% of participants had a measurable improvement in the appearance of fine lines and wrinkles.
  • 100% had measurably brighter skin. 
  • 97% had a measurable improvement in radiance and clarity. 

And now without further ado, let's take a look at the eyeshadows, which I'm sure you're most interested in reading about anyways! To avoid any confusion, I should preface this by explaining that I will start with the pictures of the eyeshadows, followed by its official description and my own personal opinion, and finally the swatches of the eyeshadows. 


Strange (a pale neutral pink matte-satin) - This color performs very well in flattering most eyeshadow looks in this palette and works best as a highlighter. The texture is quite buttery and I appreciate how its matte, so that it does not compete against the many other shimmery colors in this palette. 

Dust (pale metallic pink shimmer with iridescent micro-glitter) - I've heard mixed reviews about this color but I'm really digging it. The micro-glitter in this eyeshadow makes fallout nearly unavoidable. I would avoid packing this one on on my eyelid but I find that this looks beautiful when worn in the inner corners. 

Burnout (light pinky peach satin) - This one is still relatively light compared to the other shadows in the palette. It has great pigmentation with no fallout at all. If you're looking for a light wash of pink on the eyelid, this would be your best bet over Dust. 

Limit (light dusty rose matte) - This shade is great for everyday makeup and actually shows up a little more mauve than pink when blended out onto the eyelid. It's great for blending and works great for deepening the eye crease. 


Buzz (metallic rose shimmer with silver micro-glitter) - A soft pinky color, Buzz pretty much looks like how it does in the pan and blends out buttery smooth. I find myself picking this color up when I feel like doing a soft, feminine look. It blends out to a nice, soft medium pink. 

Trick (light metallic pinky copper shimmer with tonal mid-sparkle) - Initially, Trick looked quite coppery and even similar to the shade Chopper from the Naked Palette 2. I didn't find myself using this much at first but was pleasantly surprised to find that this color comes out more as a soft rose gold. There is a bit of an orange tint, but it nicely complements most colors in this palette. To add dimension, I recommend blending a small amount of this color onto the eye close to the inner corner. 

Nooner (medium pink-brown matte) - One of my absolute favorite matte colors to use out of all the Naked series, Nooner works well as an all-over shade up until the brow bone. It's a great transitional color for smokey eyes and comes out darker than Limit. I find myself reaching for this shade the most. 

Liar (medium metallic mauve shimmer) - Great for a medium smokey eye, this shade is warm and bronze-y with a pinkish tint. This is probably one of the more versatile shades in the palette, as this looks great blended with all of the last four shades. 


Factory (pinky-brown satin) - Now I know Factory and Mugshot look pretty different next to each other, but I use the two pretty equally interchangeably. Factory is a lot warmer than Mugshot and looks bright and shimmery when blended out. 

Mugshot (metallic taupe shimmer with a slight pink shift) - Do not underestimate the pigmentation of this particular shade because a little bit goes a long way! This looks more like a light taupe but when blended out, it's actually capable of standing on its own if you feel like going for a cool-toned eye look. 

Darkside (deep taupe-mauve satin) - This is definitely one of the more fascinating colors in the Naked 3 palette. I've never spotted this shade anywhere else before and I want to say it's dark purple-toned taupe. This would obviously work well for smokey eyes but you'll have to pack it on and then blend it out to get full color payoff. 

Blackheart (smokey black matte with rosy red micro-sparkle) - Love, love, LOVE this color! As the Naked Palette 3's darkest shade, I was skeptical about this color because I wasn't sure how well it would complement the other colors. Let me just tell you, this shade is hot! It's definitely smokey but it's not even close to the darkest black eyeshadow I own. But is it amazing? All signs point to yes, and this is perfect for creating those alluring dark smokey eyes for a night on the town. And plus, who doesn't love to glitter a little? 


Rating: ❤❤❤❤❤

I have to admit, my expectations were blown away by this palette and as I continue to experiment with different colors and looks, I find myself appreciating this palette more and more. A solid purchase, I would definitely say that this palette is worth the steal even if you do own any of the other Naked palettes. The Naked 3 Palette is very pink-based and I can see how some people may be put off by that factor. But it's definitely the most different from the last two palettes and will probably look a lot better on you than you think. Is it a must-have? Well, I suppose that's debatable. But it's definitely one of the my most-used palettes at the moment and probably will be for a long time...until the Naked 4 Palette comes out. Then we'll have a problem. Just kidding. Not really. 

So what did you think of the Naked 3 Palette? Did you grab yours yet or are you planning to get it in the future? Do you think that this palette is worth the price hike? And do you own any of the other Naked palettes? Urban Decay lovers and newbies, let me know what you think in the comments below! 

With Love, Tiffany 


Thursday, December 26, 2013

Geo Princess Mimi Starmish Brown Circle Lens Review

Why, hello, my lovelies! Surprised to see me? I have finally come out from hibernation at last! I know it's been a really LONG time since I've updated, and it does feel a little strange to be typing this right now. I do apologize for disappearing, but around the time of July, I started a new job and was quite busy trying to get the hang of everything. And it got difficult to get back on track with blogging, especially since I had been doing a lot of social media and blogging for my new company. But recently, I've decided that I wanted to get back into the blogosphere and blog when I do have the time. ^^

I was recently contacted by Maplelens.com who were kind enough to sponsor me for review purposes. Before I get started on my review, I just have to applaud them for their super speedy shipping times. From the time I chose my lenses to when I actually received them was about less than a week. And please note that they're shipping from Malaysia as well, and since I'm based in the US, this was probably the fastest I've ever received lenses from anywhere. They offer free shipping for orders over $50, and $10 for shipping to the US with a time frame of 3-5 days.

When it comes to circle lens, I have a tendency to stay on the conservative side and I don't really wear other colors besides brown or green. I know the whole MLBB (my-lips-but-better) schtick has been making its rounds in the beauty community. Well, I'm definitely more of a MEBB (my-eyes-but-better) kind of circle lenses girl. The Geo Starmish Brown lenses was a perfect combination of sexy and natural, without coming off too costume-like.


Product Information

Brand: Geo Medical
Origin: Korea 
Diameter: 14.5 mm
Base Curve: 8.6 mm
Water Content: 38%
Life Span: 1 year disposable 


I was pleasantly surprised to find the lenses wrapped neatly inside a cute heart shaped box. Other places I have ordered from usually just send the lenses wrapped with many layers of bubble wrap. Like many other circle lens stores, they were kind enough to include an adorable animal contact lens case. 


Upon taking out the lenses, I was a little intimidated by how light they looked. I had never worn any brown lenses besides the normal dark-brown, natural-looking ones, but I was definitely excited to try these, since I've heard nothing but good things. 


Low Light 


Daylight 

However, after putting them on, I was definitely blown away by how beautiful they looked. When it comes to sporting lenses like these, you really do get the best of both worlds. Natural yet vibrant, the Geo Starmish Brown lenses are for people who want something that will stand out but still look subtle enough to complement a look, not overtake it. The pattern is simply gorgeous with a blend of brown, orange and gold and blends well with darker colored eyes. And of course, the outer black rim, which is characteristic of the Geo Princess Mimi lenses, do an excellent job of enlarging and enhancing the color. 


While these lenses do fall into the "Brown" lenses category, I have to say, they are not your typical natural-looking brown lenses that you would use for subtle enhancement. Most people would definitely be able to tell you're wearing colored circle lenses but not in an overly fake way. The best way to describe the color would be along the lines of a gorgeous amber. While I in no way endorse the Twilight Books, I felt a bit vampy with these on and was definitely reminded of their golden eyes. 


Natural makeup - Done with the Urban Decay Naked 3 palette

What I really love about these lenses is how versatile they are. You can wear them with natural looking makeup like I have done here or you can go for a more dark and smokey look. Either way, the color of the lenses really makes the eyes 'pop' while adding just a hint of sexiness. I have to admit, my boyfriend could not stop raving about how much he loved these and my guy friends complimented them. The sparkling, vivid honey color will complement a wide range of styles and look great for those of you who want to sport the gyaru look or Japanese-style makeup. 

Comfort-wise, these are pretty comfortable, but my eyes did start to feel a little tired after about five hours. However, I have found that they don't feel much different from the other 14.5mm lenses I've tried. They felt exactly like most of the other colored varieties in the Geo Princess Mimi series. 

Pros

  • Gorgeous amber or honey-brown colored lenses, depending on the lighting 
  • Vivid color payoff without looking overly fake 
  • Beautiful blend of different colors
  • Great enhancement at 14.5mm (which in my opinion is the magic number for circle lenses)
  • Versatile and great for both minimal or heavy makeup
  • Looks natural enough to blend with brown eyes 
  • The ideal lenses for Japanese or gyaru makeup
Cons 
  • Can feel a bit drying after 5 hours 
Rating: ❤❤❤❤

At $20.90,  I definitely feel like these circle lenses are worth owning. For those of you who like natural lens with a hint of dolly cuteness, you will definitely like these. A lot of brown lenses that don't fall into the darker category, have a tendency to look unnatural, but these are the perfect in-between that you can wear if you want your eyes to stand out without looking too obvious. Will I be purchasing these lenses when it's time for a new pair? In a heartbeat!  

So what did you think of the Geo Starmish Brown circle lenses? Do you own a pair yourself? What are your thoughts upon them? Are these a pair that you would be interested in wearing? And are there any other brown circle lenses that you'd recommend? Let me know in the comments below!

With Love, Tiffany 


Tuesday, July 9, 2013

Review: Lioele Aroma Soft Peeling Gel + With Love, Tiffany's 50+ Follower Giveaway Winner!

Hello, everyone! I have finally decided to come out of hibernation to update you guys on my giveaway winner and talk about a product I've been loving. I know it's been over a few weeks since I last updated but things have just been really crazy and busy and I haven't been able to squeeze in an entry. I apologize that I haven't been able to keep up with your blogs on my blogroll lately but I definitely will be checking them out again. Hopefully, you guys haven't forgotten about me! Now that I've freed up some time, I will be back to my regular posting schedule again. 


Anyways, let me tell you about a product that I've been using religiously for the past few weeks! I'm not sure if you regularly use peeling gel as part of your skincare routine, but it would be quite useful to include it in your regime. I prefer to use peeling gel over exfoliating scrubs because peeling gel gives you the same benefits without the harsh, abrasiveness that is usually found in exfoliators. I ordered the Lioele Aroma Soft Peeling Gel from Pretty & Cute for $18.20. 

I used to swear by the Laneige Strawberry Yogurt Peeling Gel a few years back but I believe it's been discontinued and replaced with the Laneige Multiberry Yogurt Peeling Gel. I didn't quite like this product as much so that's why I ended up trying out Lioele's peeling gel.

Peeling gels are great to use a few times a week for getting rid of all that dead skin and left over makeup gunk that accumulates on your face. It's quite hot and dry here in the US this season so I often find my makeup melting off a lot faster during the day. By the time I wash my face, I end up feeling kinda gross and oily. The Lioele Aroma Soft Peeling Gel gives me the assurance that all signs of dead skin and icky residue makeup is cleaned out from my pores and I can go to bed with a fresh, clean face.


Product Information

"This product controls dead cell and impurities of skin effectively by including natural cellulous which is organic peeling substance. It helps to speed up the skin turnover cycle to make your skin clean and health and also by including vitamin A and E, it makes your skin soft."


Directions

"After washing your face, use adequate amount and apply it and massage onto face. Brush down the impurities made by massage and wash your face. After that, use Toner with a cotton pad, wiping the skin gently."

Ingredients

Water, Cellulose, Glycerin, Dipropylene Glycol, Alcohol, Butylene Glycol, Betaine, Betyl Ethylhexanoate, Phenoxyethanol, Carboxymethyl Chitosan Succinamide, Carbomer, Arginine, PEG-60 Hydrogenated Castor Oil, Methylparaben, Glyceryl Acrylate/Acrylic Acid Copolymer, Propylene Glycol, PVM/MA Copolymer, Ammonium Acryloyldimethyltaurate/VP Copolymer, Fragrance, Sodium Hyluronate, Tocopheryl Acetate, Ascorbyl Tetraisopalmitate


The design is quite simple and refreshing, with a small floral design towards the bottom of the tube and a small, cute Lioele logo. While Lioele products are still cute, they're not quite as fancy as say Etude House or Skinfood, so I don't have too much to say about the design. At least it gets the job done.


The tube is thin, smooth and sleek and fits comfortably in my hand. Thankfully, the product can be dispensed through squeezing the tube, thus eliminating any sanitary issues. However, the hole is a bit large for its size, which means that you have to be careful not to dispense too much at a time. 


During my first time testing out this product, I was surprised to see that the texture of this peeling gel came out cool and watery instead of gel-like or goopy. I tried to take a steady picture of the gel upon dispension, but it wasn't long before this tiny drop started sliding down my hand. 

To be honest, the fragrance was a bit underwhelming. The name of this product includes "aroma" but I wouldn't say that it's really aromatic in any way, just pleasant and unassuming. I would say it has a bit of a floral-ish scent with a hint of a chemical smell. I had some pretty high expectations for the product's fragrance, but oh well. 


Upon spreading it out, you may be confused to find that the watery texture seems to just spread thinly across your skin without thickening. This is why you don't actually need THAT much product to clean your face. Just a small dime sized drop onto your hand and dotted evenly onto your forehead, cheeks and chin will suffice.


After you spread out enough product on the surface of your skin, you can start massaging it in small, gentle circular motions. The peeling gel will start to pick up on the pieces of dead skin and makeup residue in small, tiny clumps. Make sure to rub all over your face including underneath your chin and the skin close to your hairline and ears. Believe me, you'll get a lot of the gunk out and your face will end up feeling a lot cleaner. I don't know about you but I enjoy the thought of going to bed knowing that my face is as fresh and as clean as it could be. Obviously, this is no Clarisonic brush but I think this works as a good alternative if you don't feel like dropping $120+ on facial cleaning products. 


And here is a picture demonstrating the effects of this peeling gel on my face. The before picture is before I washed my face. The results are quite obvious and in the after picture, you can see that my skin is definitely cleaned and brightened and my pores tightened (ooh, that rhymes!). Definitely use toner and a moisturizer right after since the pore tightening effect actually feels a bit uncomfortable on the face.

Pros
  • Does a more thorough job of removing make up and cleaning out your pores than just using regular cleanser
  • Refreshing and cooling 
  • Brightens the skin 
  • Allows you to see how much gunk and debris you're cleaning from your face 
  • Includes Vitamin A and E 
  • Softens the skin after application 
  • Tightens pores 
Cons 
  • Nothing really aromatic or special about the fragrance
  • Can dry out your face if you don't use toner and moisturizer afterwards

Rating: ❤❤❤❤

Lastly, I've been meaning to update on this sooner but I'd like to congratulate Nhi Nguyen at Tangerine Babi as the winner of my 50+ follower giveaway! The prize was sent out last week and has arrived to her safely. This giveaway ran for a month and I'd just like to thank everyone for participating and for helping me grow my blog. The growth has just been incredible and I'm so happy to have had the opportunity to meet so many wonderful and talented bloggers. To tell the truth, I really didn't expect my giveaway to receive this many entries, but thanks to all of you, this giveaway sort of blew up on its own and attracted all sorts of awesome participants. For that, again, I'd like to thank you all.

a Rafflecopter giveaway


I will be holding more giveaways in the future this year so if you didn't win this time, don't worry, there will be plenty more opportunities to win some lovely prizes from me. I'm hoping that you stick around, because I'm always up for meeting new upcoming and old bloggers alike. I know I didn't respond to comments in my giveaway entry because it was more of a suggestion box but please know that I always respond to comments in my other entries, so feel free to introduce yourself and share your blog with me ^^

With Love, Tiffany


Tuesday, June 11, 2013

Tutorial: DIY Flower Headband/Crown

Hello, old and new readers! As you can see from my title, I decided to take a break from the beauty reviews and do a D.I.Y tutorial instead. Summer music festivals all over the world are coming up in less than two weeks and of course, with such a massive event, you gotta have the daisies!


Flower headbands have picked up in the trends for music fesivals, such as this year's Coachella Music Festival. I saw so many flower headbands on Instagram this year. While many of them looked beautiful, I couldn't believe how expensive they were--$130 and up! Those better had contain some rare, exotic, real flowers flown in from the jungles of Brazil! or something Anyways, all kidding aside, in this tutorial, I'm going to show you how to make a flower headband for less than $25. In fact, this tutorial is actually good for 3-4 headbands.


Before I get into the tutorial, let me just say this--WOW. I'm overwhelmed by how quickly my giveaway has grown. I really didn't expect my giveaway to receive that many entries, but thank you so much to those who have participated! And also, thank you for all of the wonderful suggestions in my comments. :') I truly appreciate how everyone has helped this blog grow and I will continue to try my best to put out fun, quality entries. The giveaway is still going on until the end of this month, so for those of you who haven't joined it yet and are interested, please feel free to join here.


So let's get started! Since it was such a beautiful day, I decided to take my workstation outside. For this tutorial, you will need: 

  • Fake flowers - $6.50
  • Hot glue gun (high heat) + glue sticks - $6.99 + $2.99
  • Elastic headbands - $4.89
  • Thumbtacks - $1.73
  • Scissors - $1.00


The total comes out to $24.10, which is definitely under $25. I got the fake flowers from The Dollar Tree, which sells a wide variety of fake flower bundles. A truly great value, I must say, considering you get around six flowers for $1. I got six bundles of flowers, thirty-six flowers in total,just in case I wanted to use them on other articles of clothing or make extra headbands. If you live in the US, there are plenty of stores throughout the nation. 


1. First, remove the fake flower from its stem. You should be able to pull it off easily, but if it's glued to the stem, simply cut the flower off from the stem. If you wish to add leaves, remove the leaves from the stem as well. They should slide off easily after you have removed the flower.


2. If the base that is stuck to the flower is too long, then feel free to cut it with a pair of scissors. The shorter the stick, the better it will be for when you need to glue this to your headband. You'll want your flower to be able to attach to the headband as closely as possible. 


3. So that you have an idea of how your flower headband is going to look, roughly map out where you want your flowers and leaves to be. 


4. After you figure out where you're going to place your flowers, take a thumbtack and pierce the elastic headband. It should pierce with relative ease. I know I'm being Captain Obvious here, but please buy flat thumbtacks, you really don't want anything to be poking your scalp when you're wearing your headband =p


5. As soon as your glue gun is heated up, squeeze a small amount of hot glue by pressing on the glue gun's nozzle lightly. Don't distribute too much product or else you might burn yourself when you press the flower onto the headband. Just dispense enough so that the pointed end of the thumbtack is coated all around with hot glue. 


6. Fit the small hole over the pointed end of the thumbtack and press the flower down until it lies flat against the headband.


7. Hold it there for around 15 seconds or until you know the flower is secure. Hot glue dries pretty quickly, so it shouldn't be long until you can move on to the next flower. Be careful not to burn yourself. Of course, me being the klutz I am, before I began this tutorial, I accidentally picked up the glue gun on the wrong side.......don't ask me how that happened. 


8. Repeat this step with your flowers, leaving some space in between your flowers for when you place your leaves. Try to keep your flowers evenly spaced, but it doesn't have to be exact. 


9. After you have glued all of your flowers to the headband, now it's time to add the leaves. You can place the leaves wherever you wish, whether you want it to be evenly distributed or random. I alternated mine in between the flowers. Repeat the steps that you did with the flowers, using a hot glue and thumbtack to secure the leaves. 


10. You can use any type of leaves that you want, but I wanted mine to look neat for this headband, so I made sure they were arranged as symmetrically as possible. 


Ta-da! Now you're finished and you have a lovely flower crown that you can wear to any music festival, concert, fair, photo shoot or just about anywhere you'd like. You can mix and match different flowers, add more or less; that's pretty much the fun of making this flower headband. 


For my face, I kept my makeup simple with just a dark brownish bronze smokey eye and to match my pink flowers, I added a bright pink lip as well. Since you're probably going to be wearing this outdoors, you don't want your makeup to melt and look messy, so I'd advise you to just keep it simple and feminine.  


What I love most about this headband is how versatile it is. You can wear it many ways such as with silky, straight hair or with loose waves, like I did here. You can even wear it with a nice side braid or a trendy fishtail braid. You can wear the headband around your forehead a'la hippie/flower-child style. You can even just glue one flower onto the headband and place it so that you have a flower on the side of your head. 


Since I had a lot of extra material, I decided to make another flower headband. For this one, I used yellow daisies, combined with small purple flowers. I didn't make it quite as uniform as my pink flower headband, but I thought it still looked lovely. 


Flower crowns often evoke a sense of etherealness and whimsicality, which is why they look so perfect for the spring and summer season. I tried to keep this tutorial as informative and simple as possible and I hope you enjoyed reading this. Please let me know what you think of this tutorial in the comments below! Have you made any flower headbands or are you looking to make or purchase one? Where would you wear your flower headband to? 

Well, until next time guys, happy flower crowning!  

With love, Tiffany